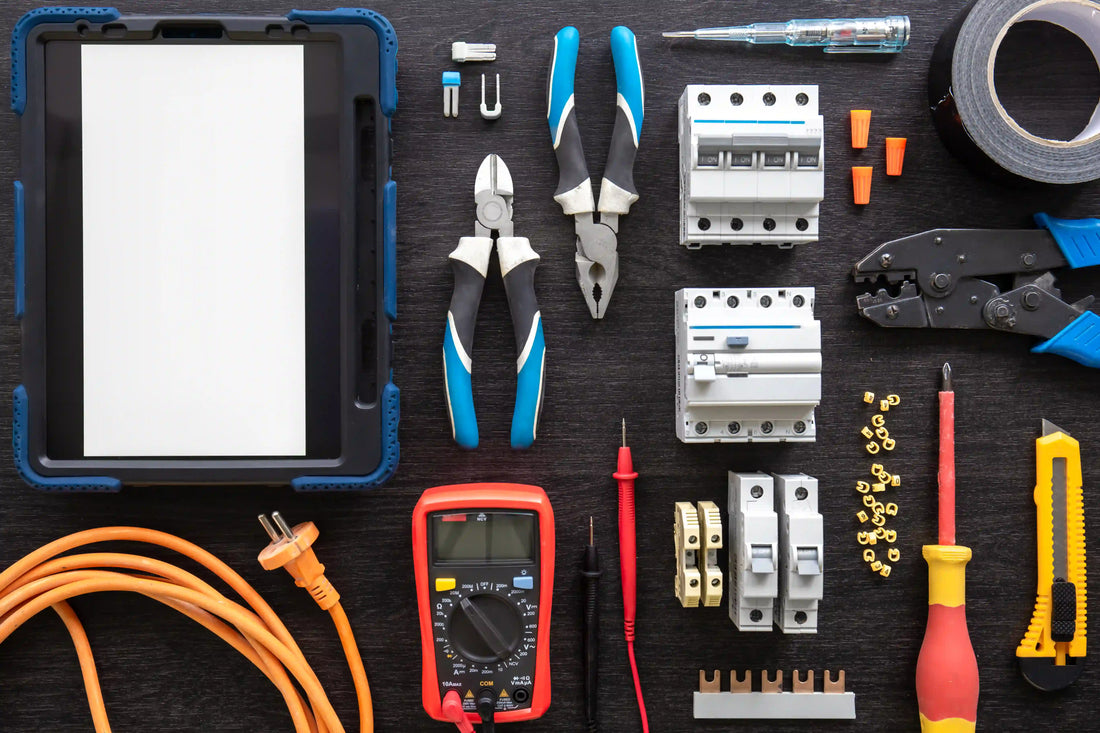
Guide to Solar Installation Accessories Australia for New Installs
Going solar isn’t just about panels on the roof—it’s also about the little gear that makes it all tick. Even the best panels and inverters can underperform or fail without the right solar installation accessories. These bits and pieces (fuses, isolators, glands, etc.) ensure your system runs safely, legally and at peak efficiency. In Australia, using the right accessories isn’t optional: for example, the Clean Energy Regulator – Solar panel and inverter serial number ledger requires that your panels and inverter be on the CEC’s approved list, and all wiring must follow AS/NZS electrical standards. This guide will break down the must-have accessories for a new install, so you can choose quality gear that keeps your solar setup compliant, durable and trouble-free.
Why Accessories Can Make or Break Your Solar Install
You might not see them once the install is done, but good quality accessories can be the difference between a stable system and one that goes off-grid on you. Think of them as the nuts, bolts and fuses of your PV system. Poorly chosen parts can cause faults, fires or even void insurance. For example, a cheap plastic isolator that cracked in the Aussie sun could let water in – and an inspector might flag that and refuse certification. In fact, a UK study found that subpar DC disconnects were the top fire risk in solar systems.
It all comes down to safety and compliance. Every component should meet Australian standards (like AS/NZS 5033 for PV wiring, and AS/NZS 4777.1 for grid-connect inverters). The Clean Energy Regulator explicitly mandates using CEC-approved modules/inverters. Skimping on accessories can violate those rules – and the installer (or homeowner) bears the risk. As one installer joked, “the panels may be shiny, but it’s the isolators and glands doing the heavy lifting.” In short, invest in quality cables, glands, isolators and the lot, or your solar dream could become a legal and technical nightmare.
Let’s Break It Down: Key Solar Installation Accessories Explained
|
Accessory |
Function |
Example / Details |
Accessory |
|
DC Isolators |
Disconnect DC supply for maintenance/safety |
600–1000 V DC rated, IP66 enclosure |
DC Isolators |
|
Cable Glands |
Seal cable entries; moisture/dust prevention |
IP66–68, UV‑stable |
Cable Glands |
|
Circuit Breakers |
Protect from overloads/short‑circuits |
Up to 1000 V DC breakers |
Circuit Breakers |
|
Conduit & Fittings |
Organise/protect wiring |
UV-rated PVC/metal conduit |
Conduit & Fittings |
|
Connectors (MC4) |
Weatherproof PV panel interconnect |
IP67 sealed, keyed pairs |
Connectors (MC4) |
|
Earth Clamps & Lugs |
Bonding panel racks to earth |
Stainless steel |
Earth Clamps & Lugs |
|
Solar Fuses & Holders |
DC string over‑current protection |
15–30 A, 1000 V DC fuses |
Solar Fuses & Holders |
|
Solar Combiner / Distribution Boxes |
Centralise strings, fusing & surge protection |
4-in/2-out, IP55+, SPD |
Solar Combiner / Distribution Boxes |
|
Inverter Wall Brackets |
Secure inverter with airflow (~30 cm clearance) |
Galv/alloy, adjustable |
Inverter Wall Brackets |
|
Surge Protectors (SPDs) |
Guard against voltage spikes |
DIN‑rail Type II |
Surge Protectors (SPDs) |
|
Labelling Kit |
Compliance with AS/NZS 5033 labelling |
Pre‑printed solar safety labels |
Labelling Kit |
Each line above represents an entire sub-category of gear. For example, DC isolators and circuit breakers both protect your DC array, but in different ways. We’ll unpack the most important items next.
Isolators, Breakers & Surge Protection: The Unsung Heroes
One of the very first accessories on a PV system is the DC isolator. In layman’s terms, it’s a big safety switch on the PV array side of your inverter. If you ever need to service the panels or cut off power in an emergency, the isolator “pulls the plug” on the DC side. For years, AS/NZS 5033 actually required a separate DC isolator on every rooftop PV installation. (Australia was unique globally in that rule!) This is why most Aussie systems still include one. In practice, many modern inverters have an internal DC switch that meets the standard, but installers often still add an external isolator out of habit or insurance requirements.
But there’s a catch: DC current is tricky to stop. Unlike AC, DC has no zero-crossing, so opening a DC switch can create intense arcing. That’s why DC breakers and isolators have robust arc-quenching designs. You cannot use a standard AC breaker on a DC circuit – DC breakers are specifically rated and built to safely interrupt a constant DC voltage. (Think of an AC breaker as a swing that naturally slows at the top, while a DC breaker is like trying to stop a car at full throttle – it needs special pads and channels to put out the arc.) In short: always use DC-rated MCBs on the PV side and AC-rated breakers on the grid side to avoid malfunctions.
Surge protectors round out this section. Australia’s weather is generous with sun – but also lightning. In QLD or coastal NSW, voltage spikes from storms are real. An SPD (surge-protection device) snaps onto the DIN rail inside your combiner or switchboard and clamps any high-voltage spikes before they reach your inverter. AS/NZS 3000 recommends SPDs in high-risk areas, and they’re mandatory for some critical solar setups. Think of them like circuit breakers that work at a fraction of a millisecond to shunt lightning surges to earth. They might seem optional, but in practice adding an SPD is cheap insurance against a fried inverter on stormy days.
Solar DC isolators (bottom entry) neatly mounted beside an SMA Sunny Boy inverter. These isolator switches provide a safe DC disconnect for maintenance and emergencies.
Weatherproofing & Durability: Accessories Built for Aussie Conditions
Australia’s sun is no joke, and neither is its rain or salt air. All the little gear you use must be rugged. That means UV resistance and high IP ratings. For example, cable glands for PV output leads should be specifically rated for outdoor solar use – many are IP68 or at least IP66, made of UV-stable plastics or chrome-plated brass so they don’t crack or corrode. A cracked gland lets moisture into the box, causing shorts or corrosion. Even conduit systems should use UV-resistant PVC or metal.
Likewise, any exposed metal (like earth clamps or panel mounts) should be stainless steel or hot-dipped galvanised. A steel earth clamp will connect your panel frames to copper earth cable; if it rusted away, your system wouldn’t have a proper ground fault path. Aussie panel rails and lugs often have a TUV or SAA approval, meaning they survived salt-spray tests.
Remember: accessories might look small, but they face the elements 24/7 – sun, rain, maybe even bushfire embers. The design philosophy here is “tough love.” Don’t skimp on weather-sealing: use silicone-free IP-rated glands (per AS/NZS 5033, you should never enter an enclosure from the top), keep enclosures above flood level, and choose materials proven for outdoor solar. A little extra spend on UV-stable parts now saves burned-out gadgets later.
Solar Wiring: Connectors, Fuses & Combiner Boxes
Let’s talk wiring: The plumbing of your PV system. MC4 connectors are the standard plug-and-socket for solar. Each PV panel usually comes with its leads terminated in MC4 mates (one male, one female). These clicks are not generic electrical plugs—they’re specifically engineered to lock tightly and seal out water. Many genuine MC4s carry an IP67 rating and have rubber o-rings so rain or dew can’t get to the contacts. In short, they’re like the weatherproof, auto-locking earbuds of solar cables.
Caution: Only mate MC4-brand connectors with their own type! Mixing brands or cheaper “MC4-compatible” clones can be a serious fire risk. Investigations show that mismatched PV connectors are a top cause of arcing faults. In other words, don’t force that odd plug together – get the correct pair from the same manufacturer or a certified equivalent.
Along each positive and negative string we’ll also place DC fuses inside a combiner box. These are not your garage DIY fuses – they are 1000V DC-rated car-type fuses (15–30A is common for residential panels). Their job is to blow if a panel string short-circuits, protecting the inverter and wiring. Always match the fuse amperage to the array’s current (and to the breaker ratings). Mixing up fuse or breaker ratings is asking for trouble – each must suit the exact DC voltage and current, or you risk overheating or worse.
Speaking of combiner boxes, if you have more than 2 or 3 panel strings, you’ll likely use one. A combiner box is simply an enclosure where multiple PV strings enter, each through its own DC fuse, and combine to a single pair of outputs to the inverter. It keeps the wiring tidy and gives a neat isolation point under the panels. Most combiner boxes also house a surge protector and earth terminal. As one supplier put it, “a DC combiner can provide fuse and surge protection plus a simple isolation point for maintenance”. In practice, it’s a custom electrical junction box for solar: label each fuse (String 1, 2, etc.) and mount it out of direct sun if possible.
Mounting & Spacing Accessories: Not Just for Panels
By now you might be thinking, “Hang on, isn’t mounting hardware just racks and brackets?” True, panel racks get a lot of buzz – but other components need careful mounting too. Take inverters: they typically get a wall bracket so the inverter sits slightly off the wall. Why the air gap? Inverters generate heat, and they need airflow on both sides. Industry guidelines (e.g. SolarEdge) often recommend ~30 cm clearance behind for good cooling. Cramped an inverter on the wall and it might throttle back output on hot days. So grab a sturdy bracket (galvanised or aluminium) and follow the manufacturer’s spacing rules.
Similarly, spacing frames or brackets can keep cables off surfaces. Don’t just duct-tape a cable to a panel frame and call it a day. Use proper cable clips or spacers so wires don’t chafe. Even the DC isolators often have clips or shrouds that bring the switch out from the wall.
For rooftop panel mounts, the usual stainless-steel clamps and L-feet are used – but down below, make sure any roof-top isolator or junction box is up in the shade (north walls overheat!). On the south side or under eaves is ideal. A quick tip: use stainless screws or blind rivets to attach DIN rails or small enclosures to walls. We learned the hard way that mild steel screws will rust through in a few years on a coastal home.
Key takeaway: Airflow and secure mounting often trump looks. It’s better to have an inverter with its cooling fins on show than hiding behind panels where heat will kill its efficiency.
The Safety Side of Solar Accessories
Accessories are not just “nice-to-have” – they’re there by regulation in many cases. We’ve already mentioned the CEC approval requirement and AS/NZS 5033 wiring rules. Here are a few quick safety must-dos:
-
Earthing: Every PV panel row must be bonded to earth via clamps or lugs. Earth bars in combiner boxes connect to earth stakes. Without grounding, a live fault could energize frames.
-
Lockable Isolators: On larger or commercial systems, isolators often have provisions to padlock them in the OFF position (for maintenance safety). It’s also common to put warning labels on switches saying “PV Array Isolator – Do Not Energize”.
-
Ingress Protection: If you install anything outdoors (isolators, combiner, breakers) make sure it’s rated IP65 or higher. Water and electricity are a lethal combo.
-
Cable Protection: All live wires, even inside enclosures, should be in conduit or trunking except where terminations occur. The standards are very clear that any entry to an enclosure must be properly sealed.
Skipping these can void warranties or insurance. For example, insurers have been known to deny claims on solar fires if an unapproved accessory was used. Bottom line: install like your life (and your system’s life) depends on it – because it does.
Planning Your Install: Accessory Checklist for First-Timers
Getting all these bits together before the installers arrive will save headaches. Here’s a handy checklist of accessories to have on hand for a typical Aussie rooftop install:
-
2× DC isolator switches – outdoor-rated, knockouts or glands at the bottom.
-
Cable glands & conduit fittings – matching your cable sizes, UV-rated.
-
MC4-compatible connectors – T-branch or Y-branch kits for string combos.
-
Solar-rated fuses + fuse holders – e.g. 15A/1000V fuses for each PV string.
-
Surge protector (DIN-rail type) – DC type for the array; one for the AC output can’t hurt.
-
DC/AC circuit breakers – double-pole DC breakers up to 1000V, plus AC MCBs for AC side.
-
Earth clamp & copper cable – to bond panel racks; make sure clamp suits rail type.
-
Inverter wall bracket – size-rated for your model, with adjustable slots.
-
Solar combiner/distribution box – prefabricated with appropriate fuses, or space to install them.
As you gather these parts, double-check model numbers and ratings match your equipment. For instance, if your inverter is IP65-rated, its wall bracket and mounting screws should be too.
Common Pitfalls to Avoid
Even with the right gear, mistakes can happen. Here are pitfalls to sidestep:
-
Wrong voltage rating: Don’t use a 600V part on a 1000V system. This happens if someone buys ‘close enough’ hardware. It’s not. Everything must match or exceed the system voltage.
-
Ignoring IP/weatherproof rating: That garden GPO won’t cut it on the roof. If it doesn’t say IP65 or 66, it shouldn’t see rain.
-
Skipping fuse sizing: Each fuse must be sized to your string current. Over-fusing (using too large a fuse) can let a fault burn for longer; under-fusing trips too often.
-
Cable entry fails: Forgetting a proper gland can leave a jagged hole in an enclosure or an open conduit. Always seal open conduits with an IP-rated gland, not silicon or tape.
-
DIY connector crimps: We once saw a handyman hand-crimp 6 mm² lugs with pliers – big no-no. Use the right crimp tool to ensure a solid contact (loose crimp = heat = fire).
By planning carefully and using the right accessories, you can avoid these rookie mistakes. If in doubt, the installer’s datasheet or AS/NZS 5033 clause can clarify what’s required.
Tips for Smoother Install Days
A few on-the-job pointers to keep the installer smiling (and your system running smoothly):
-
Prep and pre-label: Have all accessories labeled and organized. Label your AC and DC breakers, fuses, and combiners so the installer isn’t guessing later which string is which.
-
Match inverter specs: Confirm your inverter’s PV input and AC output specs first. This tells you exactly which fuse amp and breaker type you need. (For example, a 6.6 kW inverter often needs two 15A DC circuits.)
-
Protect circuits: Write down each accessory’s voltage and current rating on the plans. E.g., “String 1: 500V, 10A fuse”. This documentation is even required by the regs.
-
Have spare MC4s: It’s common to lose a connector pin on site or have to extend a string. Having a spare male/female MC4 pair in your kit avoids scrambling.
-
Schedule in-season: Installations take longer in winter if cloudy or in summer if it’s ungodly hot. Plan early morning or late afternoon work to avoid heat stress for everyone (and overheating gear during install).
-
Photo doc: Take a photo of each labeled combiner, isolator with its cover open, and AC panel. The CER requires proof of installation stages, and it’s handy for warranty claims.
Wrapping It All Up: Solar Accessories Are the Silent Backbone
In the end, the fanciest panels and coolest inverters still depend on these nuts-and-bolts parts to work safely and reliably. Solar installation accessories might not shine like panels in your feed, but they quietly ensure that shine reaches your home without trouble. By choosing the right solar installation accessories – from DC isolators and MC4 connectors to cable glands and earth clamps – you’re keeping your system compliant with Aussie standards and armed against bad weather.
Takeaway: never assume “one size fits all” for solar wiring. Each accessory has a job and a rating; get them right and your system will purr for decades. And remember – if you ever spot a loose screw or a ripped seal on install day, speak up! Working with a qualified installer and referring to the Clean Energy Council/AS standards will keep your project on track.
Solar isn’t plug-and-play; it’s precision work. But with the right accessories in hand and attention to detail, you’ll have a system that not only performs well but also passes every safety check. After all, it’s the unsung pieces – the ones you can’t see once the panels are up – that truly hold it all together. Now get out there and gear up for a sunny future!
FAQs
Q1: Do I need DC isolators for every solar installation in Australia?
Historically, yes. Aussie standards (AS/NZS 5033) mandated a DC isolator on every rooftop PV system. It provides a safe shut-off for the solar array during maintenance or emergencies. Newer inverters may include integrated DC disconnects, but standalone isolators are still widely used as a safety measure.
Q2: What’s the difference between MC4 connectors and regular plugs?
MC4 connectors are weatherproof, lockable plugs specifically designed for solar panels. They include rubber seals and often carry an IP67 rating to withstand rain and dust. Regular household plugs aren’t rated for high DC voltage or constant outdoor exposure, so they can’t safely handle the sun, heat and electrical load of solar.
Q3: Can I mix and match solar fuses and breakers?
Not recommended. Every fuse or breaker is designed for a specific voltage/current. Solar DC fuses and breakers (often up to 1000V) are not the same as regular AC ones. Using a mismatched fuse or breaker can lead to overheating or arcing (poor connections in DC systems have even caused fires). Always use accessories rated for your system’s exact specs.